Products
Overview
Under the products page will be where all of the products on your system are created, edited, and listed.
Create a New Product
From the main administration page go to Products.
Products Tab
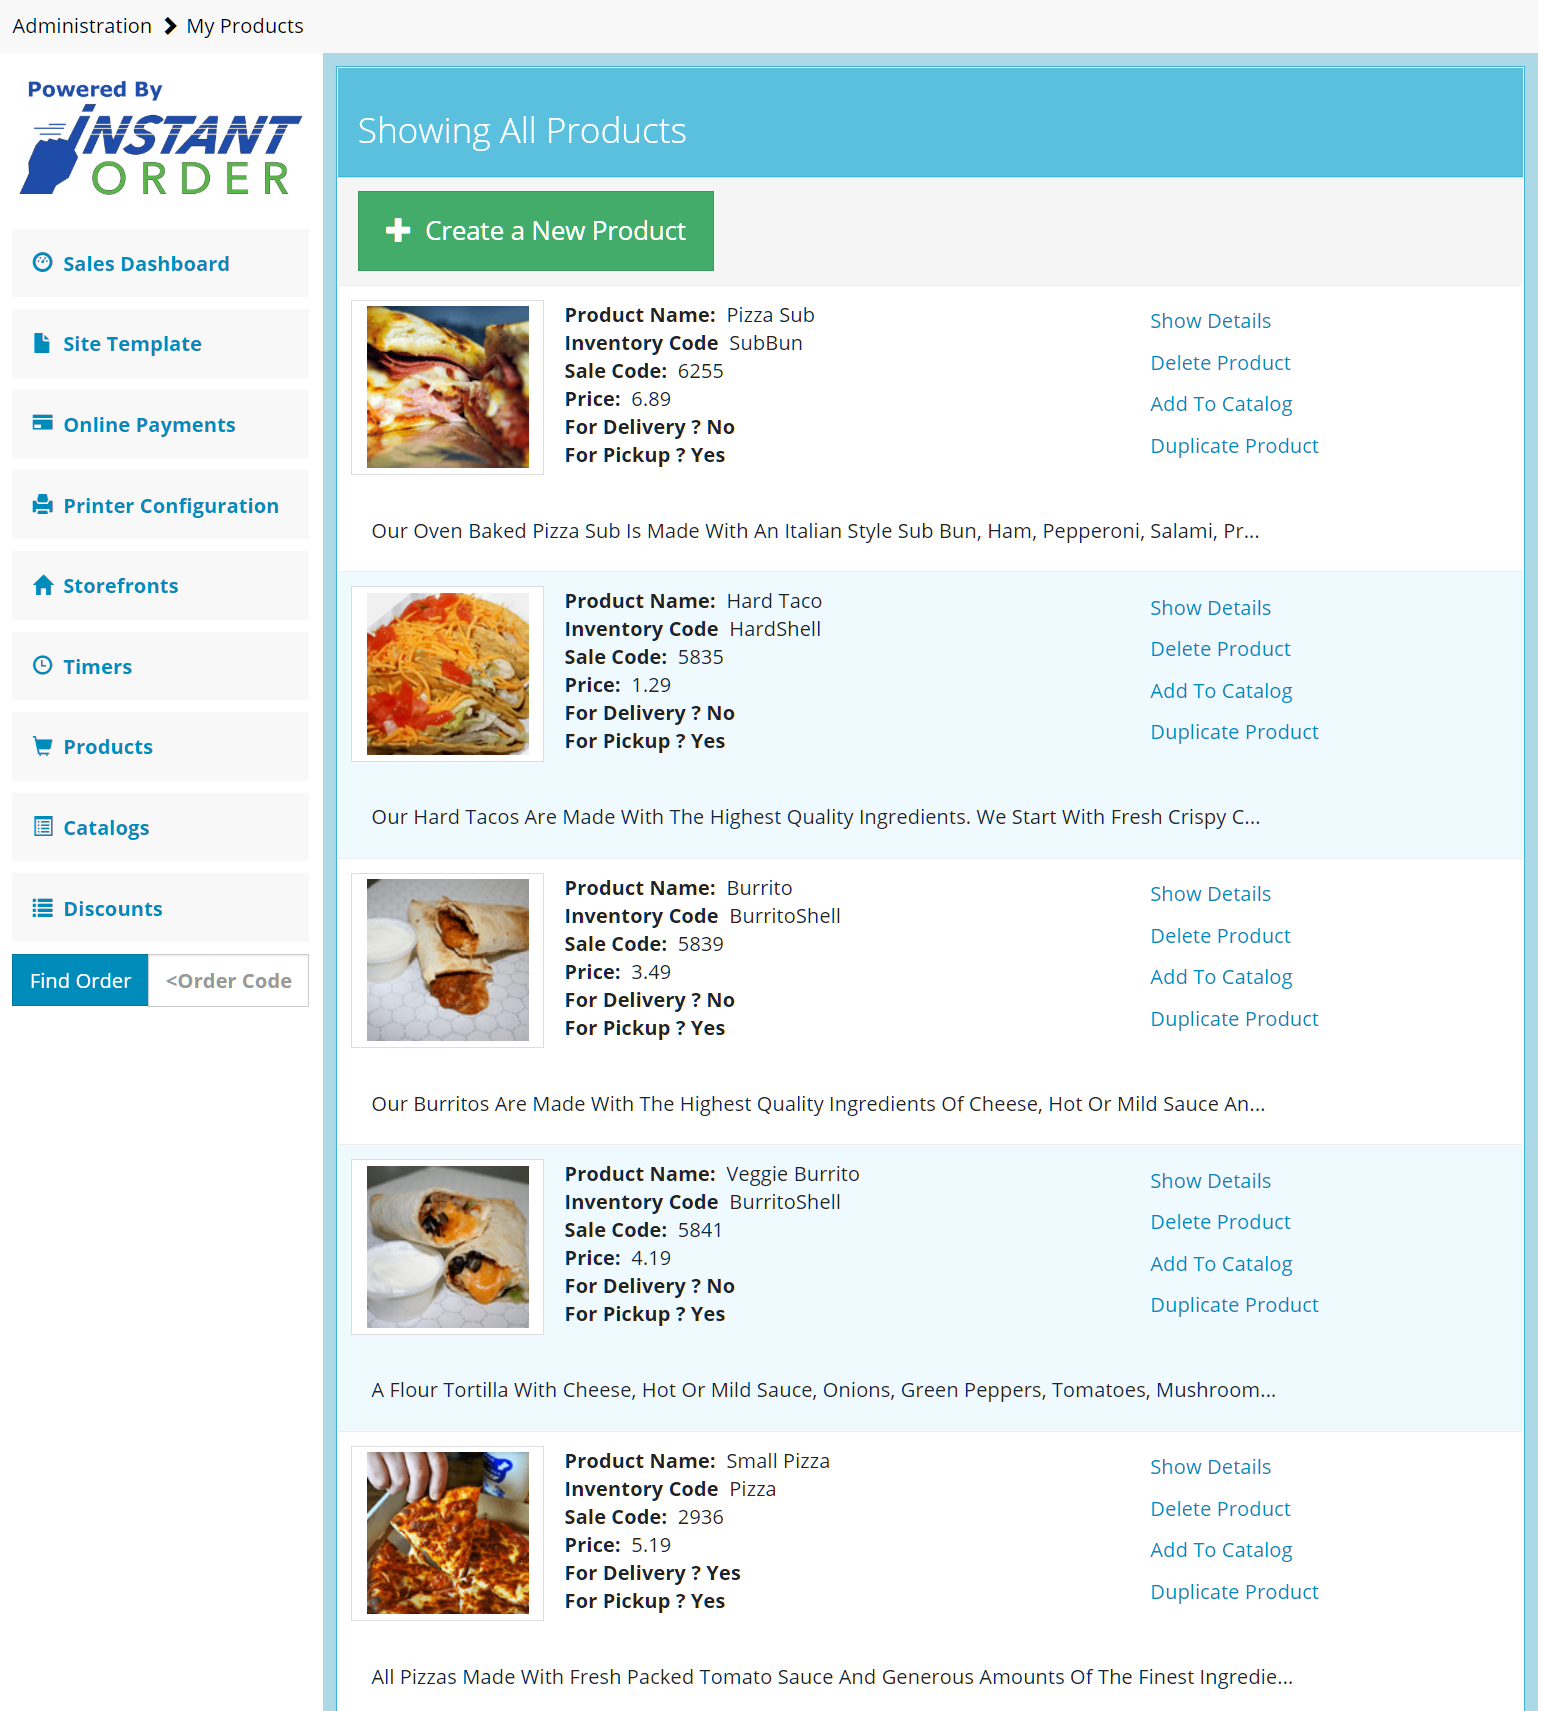
This page will display all of the products that are currently in your system.
Select, Create a New Product
New Product
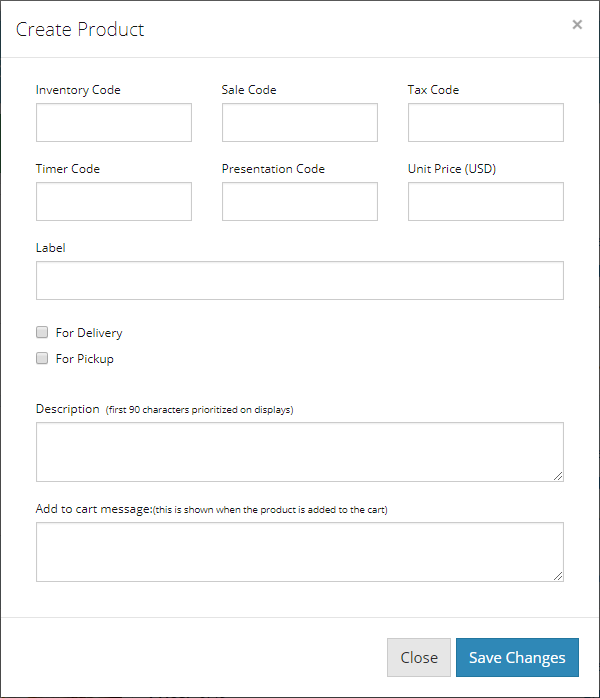
Fill in all of the necessary fields for your product. Explanations for each field are below.
| Field | Description |
|---|---|
| Inventory Code | Allows you to give each product an identification code. This can be used so that if you run out of an item that is in several other products, you can easily choose to hide the products so that no more orders are placed. For example, if a business selling pizzas runs out of mushrooms, any item containing mushrooms can be hidden so that the topping is not available for order |
| Sales Code | Each Item is given a sale code so it can be added to the POS system |
| Tax Code | Some items require a local or state tax to be added |
| Timer Code | In some businesses, different stations have unique preparation times. The timer code allows you to accurately depict how long a specific product takes to make. This gives the customer the time in which their item will be ready to pick up while maintaining freshness of the product |
| Presentation Code | Allows you to customize the look on the front end for a product. The presentation code allows you to add custom graphics for an individual item. Can be left blank if no presentation difference is desired |
| Unit Price (USD) | Easily set, or change how much each item cost |
| Label | Gives a name to the item |
| For Pickup/Delivery | Choose whether an item can be delivered, or picked up in store |
| Description | Describe the product. Will show next to the product on the web site |
| Add to Cart Message | This feature allows you to add a promotional message after an item is added to the shopping cart |
Don't Forget!
Once all product information is entered select Save Changes to move on.
Adding a Photo
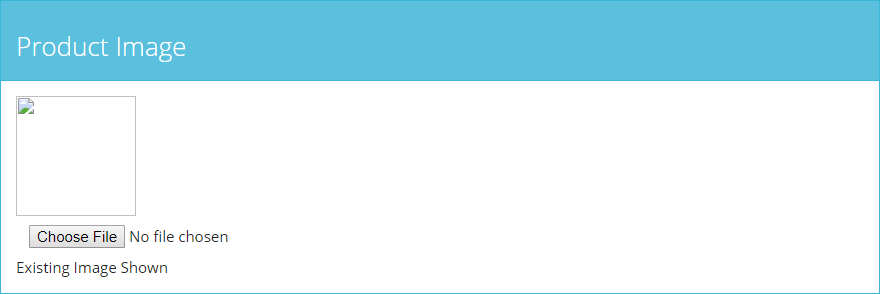
Part of creating a product is adding a photo. Note that only .png files are excepted. File converters can be easily found online.
Online Image Converter
Within the product that you are uploading go to the product image section to upload a .png of your product.
Upload Product Image
Simply select Browse and upload the picture from your computer.
Option Groups
Product Object Group details are product modifiers that allow a customer to select a setting that cannot be “and or”. These options will be shown with a drop-down bar. Businesses use option groups for available sides or item specific options like pizza crust.
Option Groups
This picture shows what a Product Option Group looks like on the front end.
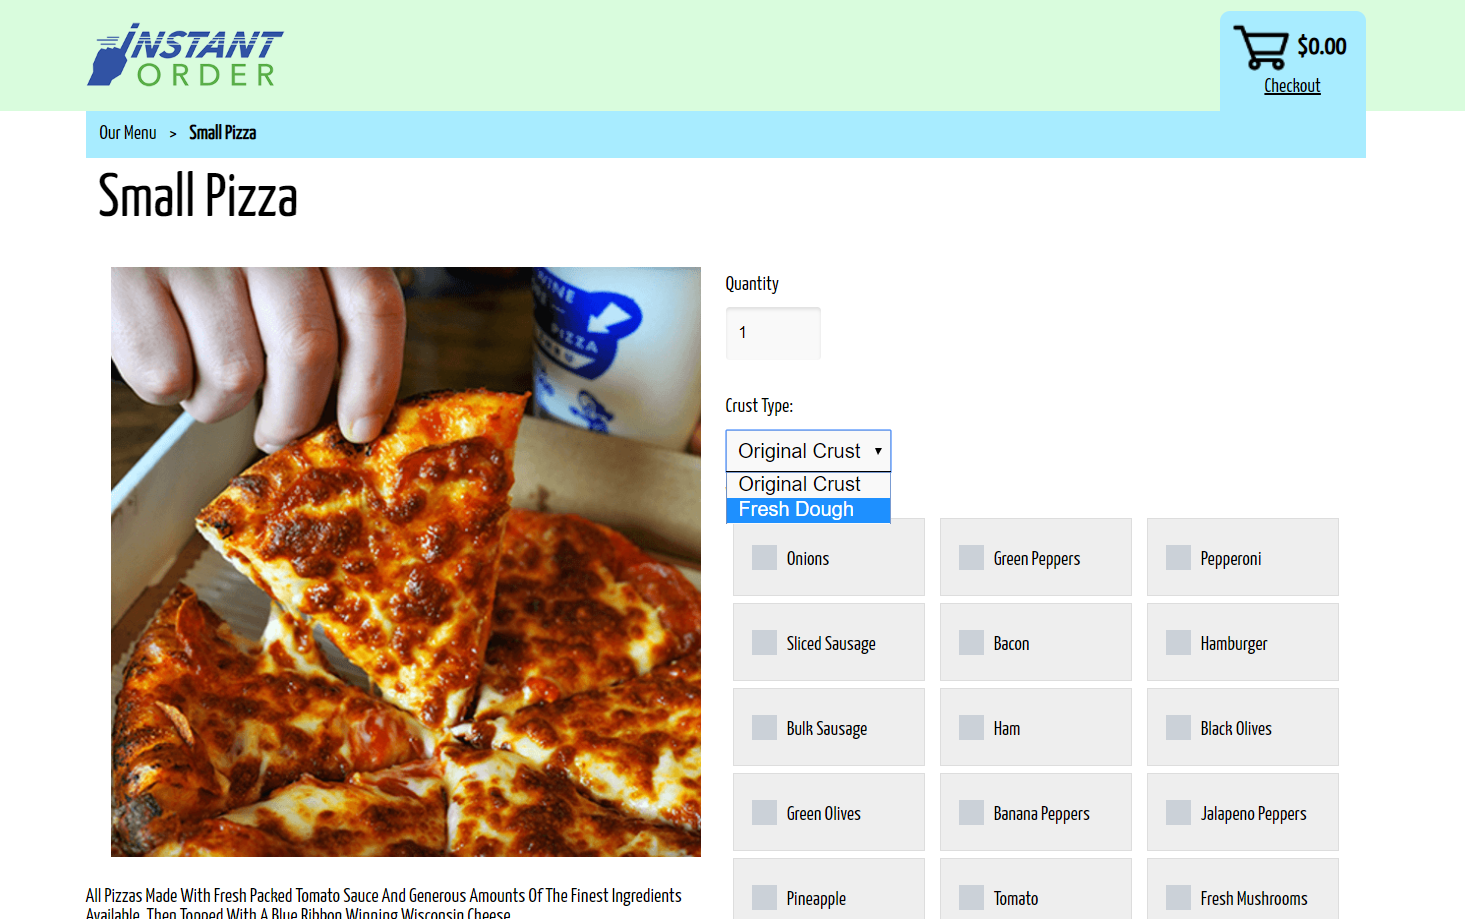
Give the Option Group a label and description. For example, pizzas, would have crust type as a group code.
Don't Forget!
Once all product information is entered, select Save Changes to move on.
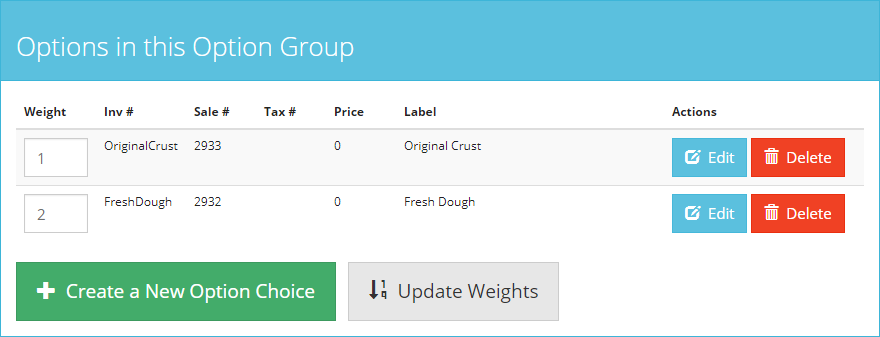
Now that the Option Group has been created, it is time to populate it with some Options.
Option Groups - After Save Changes

Select Create a New Option Choice and fill out all of the options that apply to your business.
New Option Choice
| Field | Description |
|---|---|
| Label | Gives a name to the item |
| Sales Code | Each Item is given a sale code so it can be added to the POS system |
| Inventory Code | Allows you to give each product an identification code. This can be used so that if you run out of an item that is in several other products, you can easily choose to hide the products so that no more orders are placed. For example, if a business selling pizzas runs out of mushrooms, any item containing mushrooms can be hidden so that the topping is not available for order |
| Tax Code | Some items require a local or state tax to be added |
| Price | Set how much the item cost in USD |
*When all desired options have been added to the option group be sure to select a default option before finishing up with saving the changes.
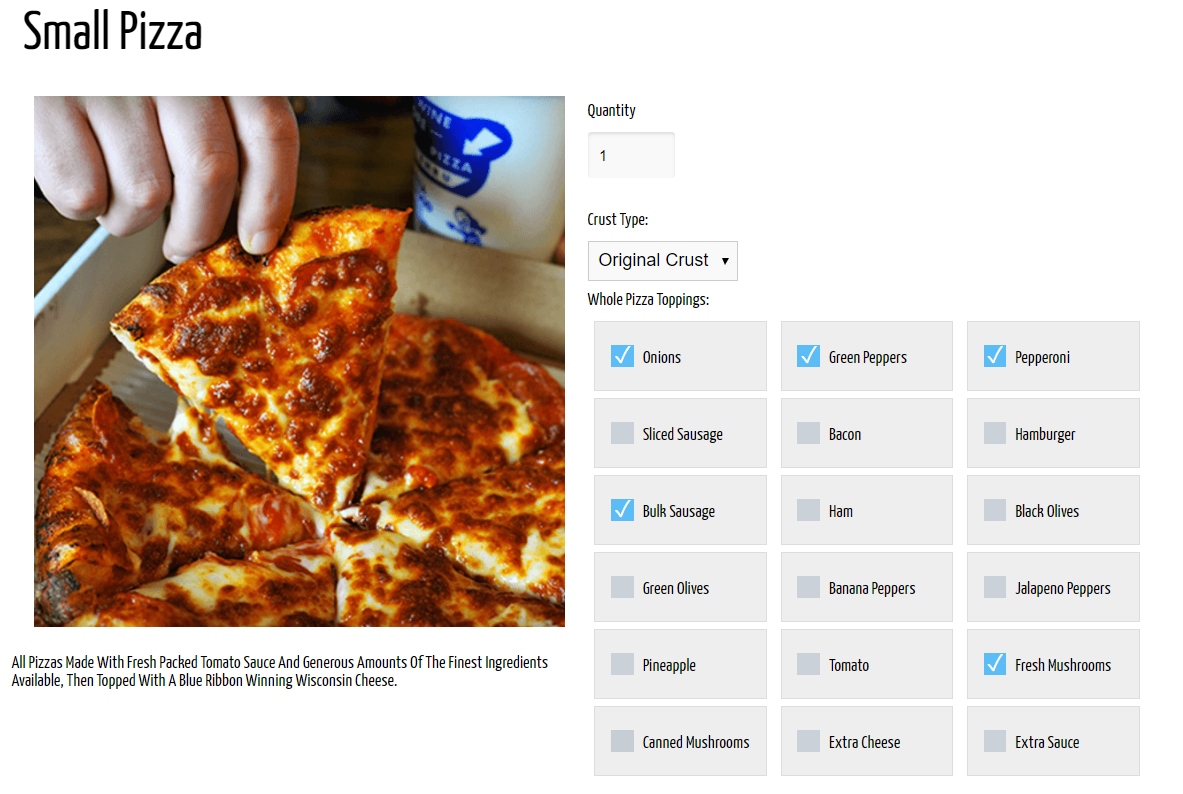
Addon Groups
Select Create a New Add-On Product Group under the product’s page.
Give the item a label and description.
Addon Groups
This picture shows the Option Groups. The Options Groups are all of the pizza toppings.
Once the Add-On Product group has been created, it is time to populate our group with some options.
Select Create a New Add-On Item.
| Field | Description |
|---|---|
| Label | Gives a name to the item |
| Sales Code | Each Item is given a sale code so it can be added to the POS system |
| Inventory Code | Allows you to give each product an identification code. This can be used so that if you run out of an item that is in several other products, you can easily choose to hide the products so that no more orders are placed. For example, if a business selling pizzas runs out of mushrooms, any item containing mushrooms can be hidden so that the topping is not available for order |
| Tax Code | Some items require a local or state tax to be added |
| Price | Set how much the item cost in USD |
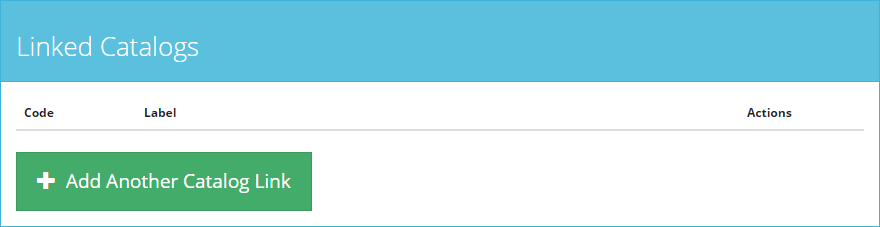
Linked Catalogs
Linked Catalog is located at the bottom of each individual Product page. Linked Catalogs are used to place each item into a category that is displayed on the front end.
Catalogs - Frontend View
Go to the bottom of the desired product page to add a product to a Catalog.
Adding a Product to a Catalog
Here's a Tip!
Removing a specific product from a Catalog is the best way to temporarily remove a product from the front end.
Edit Prices
As time goes on prices for products change. Because of this InstantOrder is designed to provide an easy way for you to change product prices.
First go to the Products page and go to the desired product.
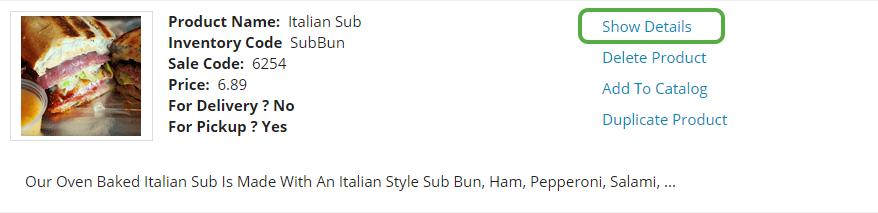
Over the product that you would like to edit the price of select, Show Details.
Show Details
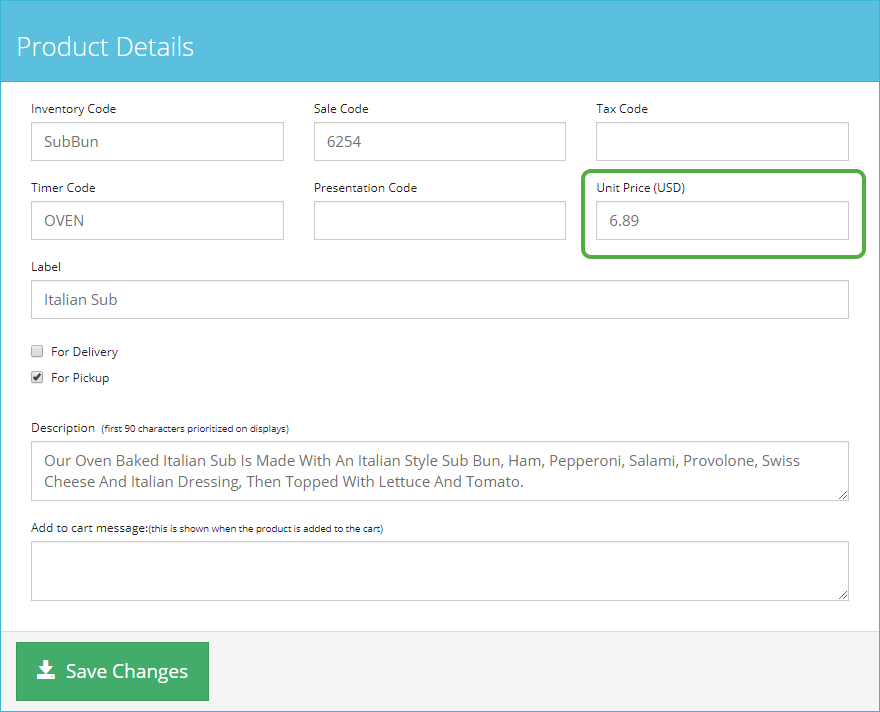
Simply go to the unit price and type in the new price then select Save Changes.
Editing Product Price
Removing a specific product from a Catalog is the best way to temporarily remove a product from the front end.
Temporarily Remove a Product
These steps will guide you to remove a product from the front end without deleting the product. This could come in handy when your business runs out of a product temporarily.
Duplicating Products
These steps will guide you in copying an existing product. This tool makes adding multiple, similar items easy!
Start by selecting Products from the dashboard.
Products Tab
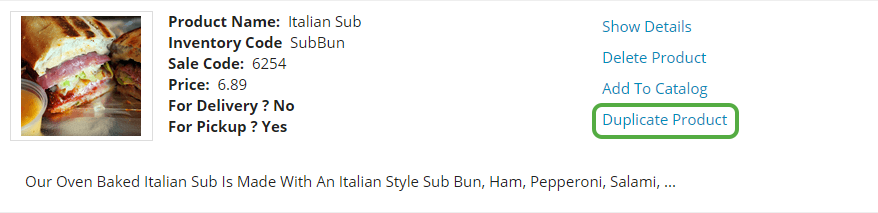
Then go to the product that you want to duplicate. The best products to duplicate are the products with the most similar option and product groups, these take the longest to create.
Duplicating a Product
Select Yes on the window that appears and the product will be copied and listed at the bottom of the products page.
Select show details on the new product to make any necessary edits to the copied product.
Remember!
After any product edits select Save Changes.