Storefronts
Overview
Storefronts contains information about your business including location, name, store hours, delivery settings, and printer settings.
The Storefronts panel will also be used to disable the menu for holidays and edit store timers.
Create New Storefronts
To create a new storefront go to Storefronts on the main dashboard. The Storefronts window will display any current Storefronts.
The reason that a business could have more than one storefront is if there is more than one location in which your business operates. For example, chain restaurants would have a storefront for each location.
Select Create a New Storefront to begin the process.
New Storefront
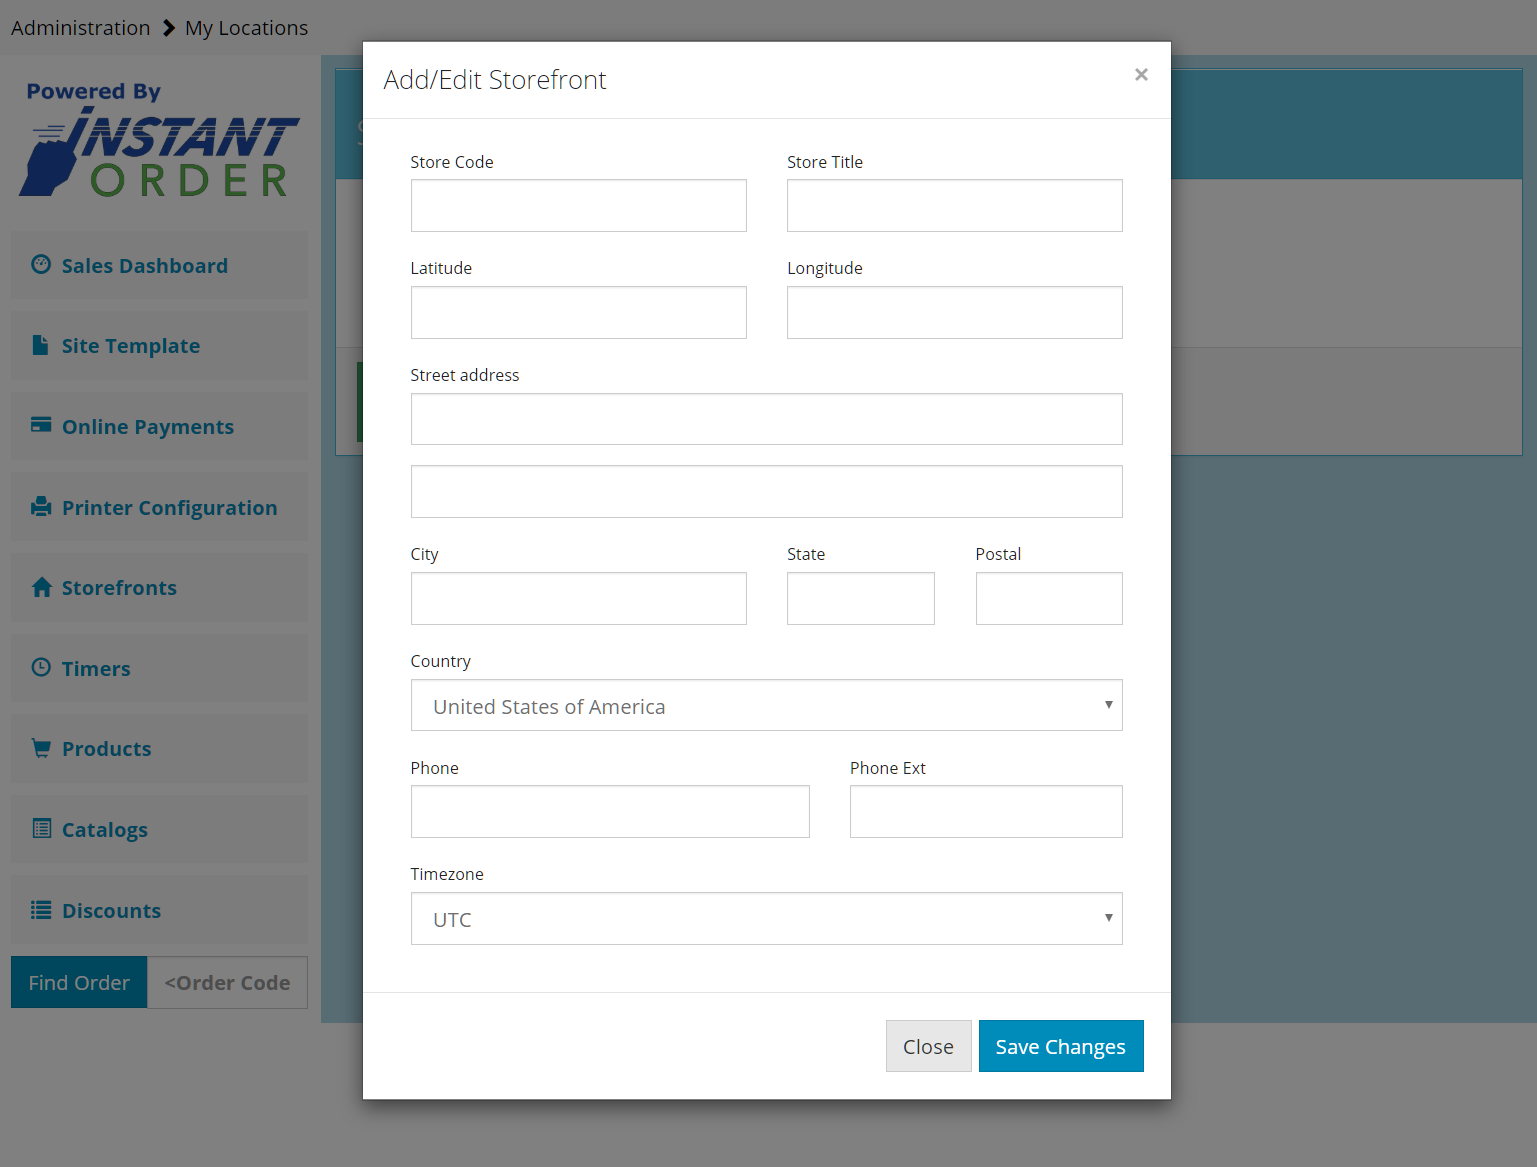
The window above will need to be filled out. We will go over each item that needs to be entered in this window.
| Field | Description |
|---|---|
| Store Code | Enter any number, this number is used to define your store to separate Storefronts |
| Store Title | Name of the Store |
| Latitude/Longitude | Pinpoints exact location of business. Can be easily found on google earth |
| Street address/Postal Info | Business’s street address and postal information |
| Time zone | The time zone that your business operates in |
Remember!
Once all the options have been filled in with the business’s information, select Save Changes.
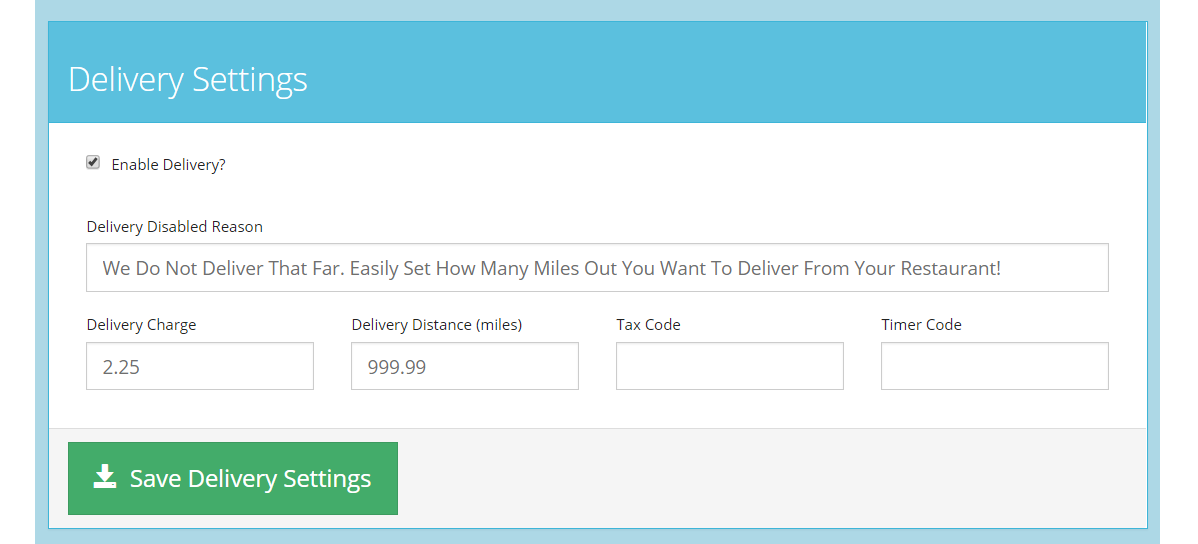
How to Change Delivery Status
The first sub section of your storefront is Delivery settings.
Delivery settings contains the delivery charge and delivery radius that your drivers are willing to drive to.
After any changes made to this section remember to select Save Changes.
Delivery Settings
Don't Forget!
If you want customers to be able to order for delivery, check the box that states Enable Delivery.
Printer Settings
Printer settings contains both networking information needed for your system to function properly and editable settings, that can improve your businesses processes.
Additional prints give you the ability to print more than one prep ticket.
Listed Catalogs
Under Listed Catalogs is where set store hours come from. This system allows you to have flexible menu times. For example, a breakfast menu that is no longer available at 11:00 AM can be set in this page.
How to List Catalogs
Listing Catalogs sets up unique menu times for each Catalog. This is useful when setting up breakfast menus and alternating operating hours.
Catalogs are created in the Catalogs section of the dashboard, but listing the Catalogs takes place in the Storefronts section. Catalogs will have to be created prior to listing them in the storefronts section.
Go to the Storefronts section on the dashboard and select Show Details on the desired Storefront. At the bottom of the Storefront page is where Listing Catalogs is located.
To begin the process select, Attach a Catalog.
Attach a Catalog
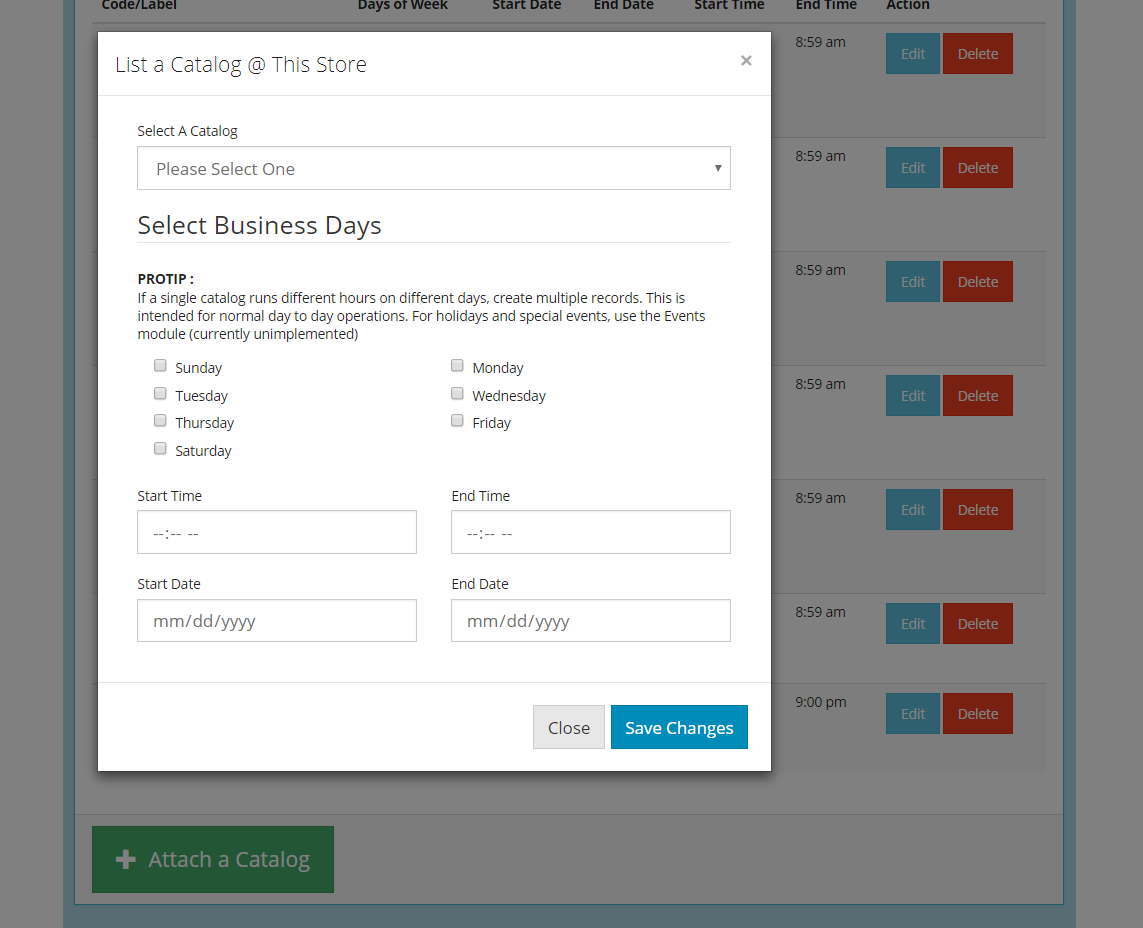
Fill in all of the information for a given Catalog.
| Field | Description |
|---|---|
| Select A Catalog | Choose a Catalog to add to Listed Catalogs. For example, breakfast, fried food, pizza |
| Select Business Days | Choose what days this Catalog applies, can also be used to define store hours for different days |
| Start Time-End Time | Select the time that the product will be available to purchase. For example, 10:00 AM to 11:00 PM |
| Start Date-End Date | Can be used for seasonal items, if the item is available year-round set an end date one year later |
Remember!
Once all of the fields have been filled out select, Save Changes.